
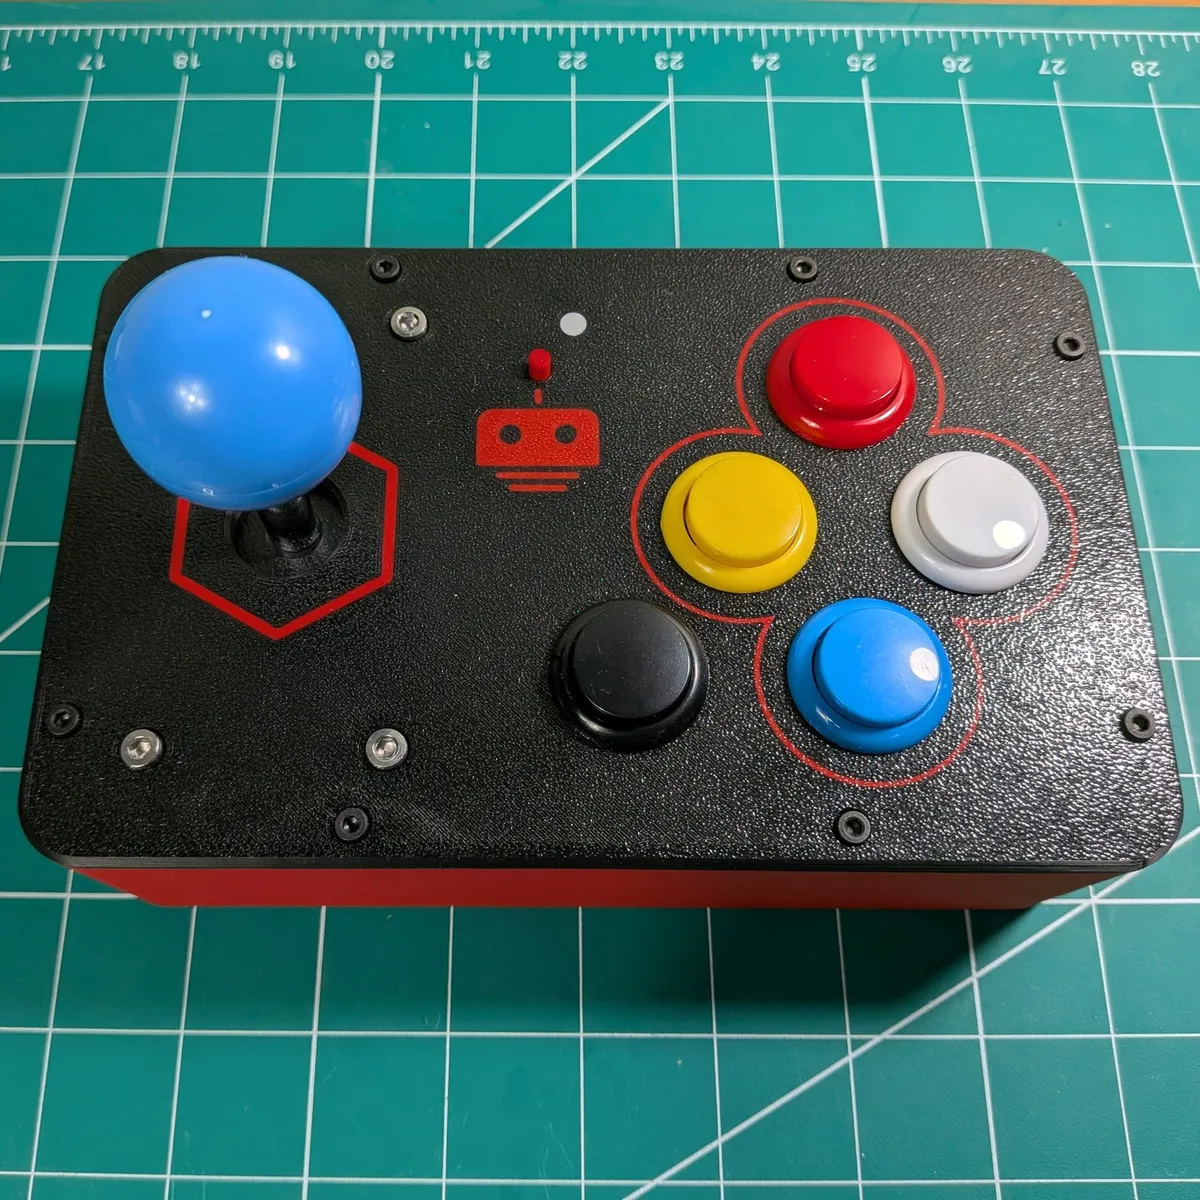
The Arcade Remote turns real arcade hardware into a WiFi controller for robots: a microswitch joystick, five snap-in arcade buttons, and an ESP32-C6, all in a 3D-printed cabinet that fits in your hands. It drives every RookiDroid hexapod, and any other robot that speaks the same UDP protocol.
Overview
An arcade stick for a six-legged robot
Each RookiDroid hexapod (Nougat, Mochi and Macaroon) hosts its own WiFi access point and listens for UDP commands. The Arcade Remote joins that access point directly, with no router in between, and sends the robot one command at a time, built from whatever the joystick and buttons are doing. Switching robots means changing a single line in the sketch.
- Real arcade feel: a microswitch joystick and five snap-in arcade buttons. No analog sticks and no deadzone.
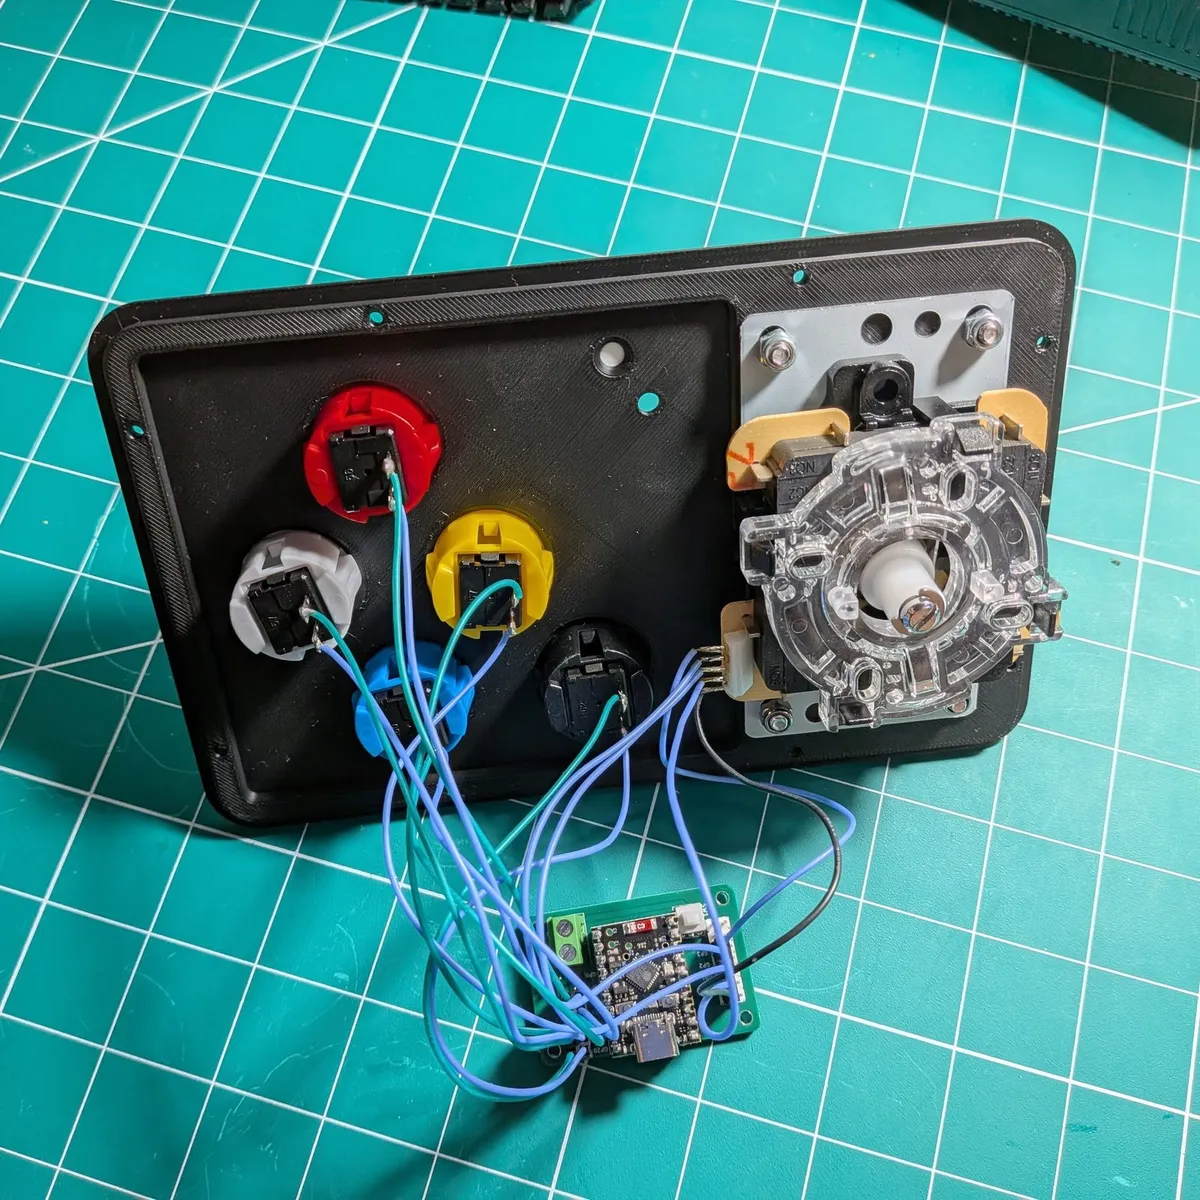
- All-digital inputs: nine switches on
INPUT_PULLUPGPIOs, scanned every 5 ms. A command has to hold for 30 ms before it is sent, which filters switch bounce and half-pressed combos. - Stops when you let go: a new command goes out as soon as it settles, and the current one repeats every 50 ms, so releasing the controls stops the robot right away.
- Adjustable speed: five levels from 20 % to 100 % of the robot's gait speed, remembered across power cycles.
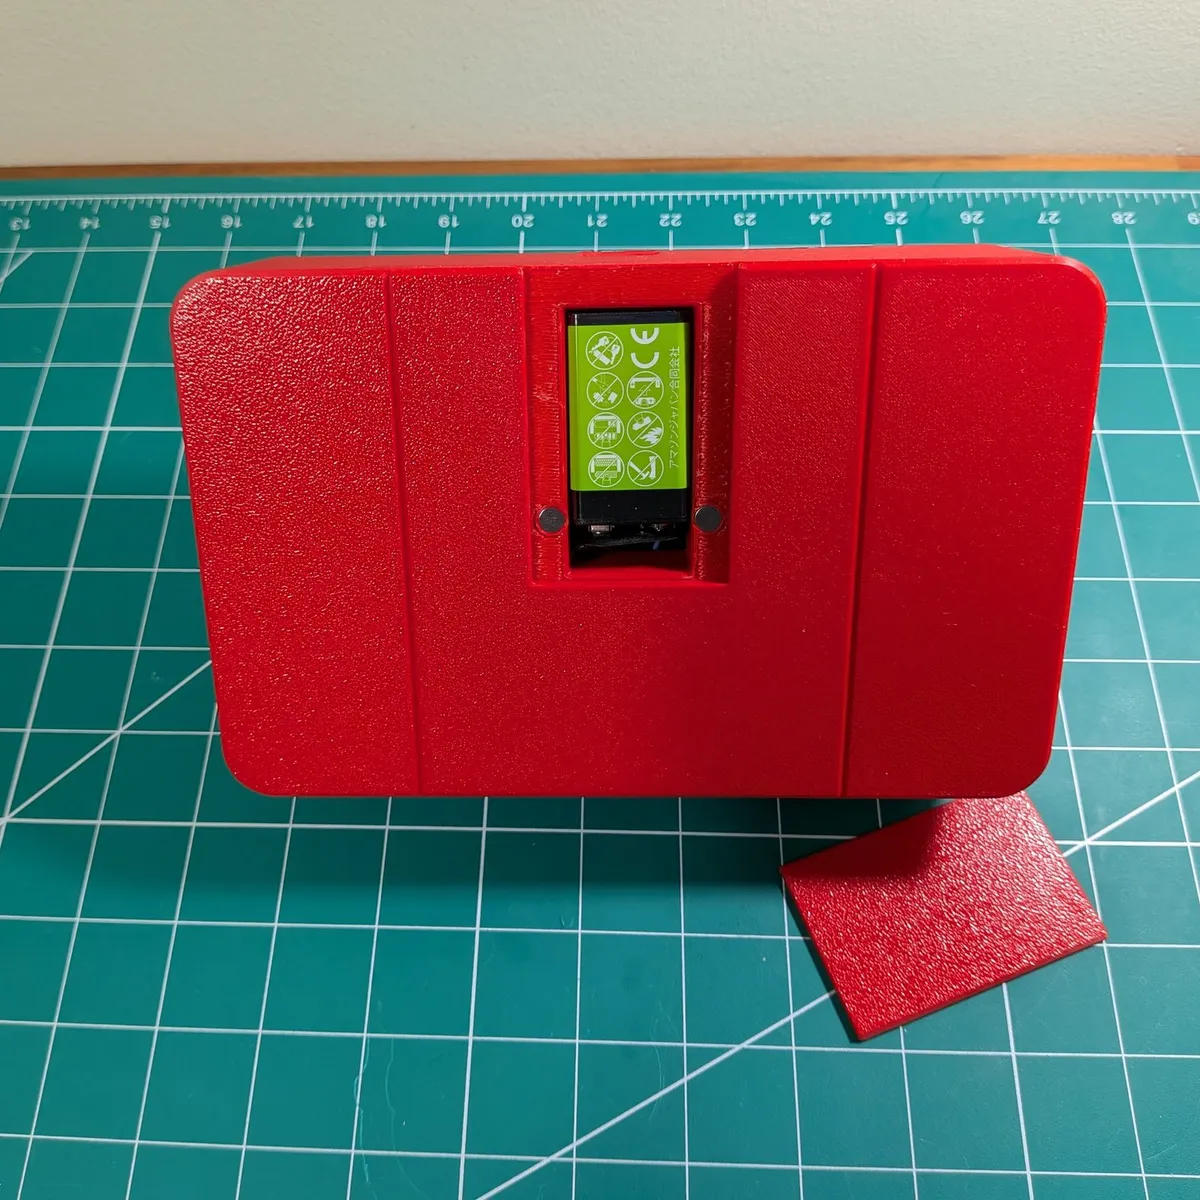
- Battery powered: a single 9 V battery in a bay closed by a magnetic cover, no screws.
Hardware
ESP32-C6 · arcade parts · one print project
| Input | Signal | GPIO | Header |
|---|---|---|---|
| Joystick up / down / left / right | JS_UP JS_DOWN JS_LEFT JS_RIGHT | GP3 GP2 GP0 GP1 | 5-pin joystick |
| Buttons up / down / left / right | BT_UP BT_DOWN BT_LEFT BT_RIGHT | GP14 GP15 GP18 GP19 | 2×7 button |
| Special button | BT_SPECIAL | GP20 | 2×7 button |
| Status LED | PIN_RGB | GP8 | WS2812 on the SuperMini |
Every input is a plain switch to ground: the firmware enables the internal pull-ups, so one terminal goes to the signal pin and the other to any GND pin.
Controls
One command at a time · nothing pressed means stand by
Joystick
Walks in eight directions, and takes priority over the direction buttons.
- Up / Down
- Walk forward / backward
- Left / Right
- Sidestep left / right
- Diagonals
- Walk at 45° and 135° either side
Direction buttons
Used when the joystick is centered.
- Up
- Walk forward
- Down
- Walk backward
- Left
- Turn left in place
- Right
- Turn right in place
Special + button
Holding special turns the cluster into body motion.
- + Up
- Body pitch
- + Left
- Body roll
- + Right
- Body yaw
- + Down
- Body twist
How It Works
Switches to UDP in four steps
192.168.4.1:1234 on the robot's own APEach packet is 7 bytes, little-endian and unpadded, and matches UdpControlPacket in the hexapod firmware. The speed byte needs hexapod firmware with motion-speed support; older firmware only accepts the 6-byte packet, so update the robot too. The remote connects in the background and keeps retrying, so the robot and the remote can be powered up in either order.
Build One
Print · wire · flash
Open arcade.3mf in Bambu Studio: PLA, 0.2 mm layers, 0.4 mm nozzle. No AMS? Print the cover in a single color.
Snap the buttons into the cover, bolt the joystick down with M4 hardware, mount the board on M2 standoffs, then close the cabinet with M3 screws.
Upload software/arcade/arcade.ino with Arduino IDE 2.x, the esp32 board package 3.x, and the Adafruit NeoPixel library.
Point it at your robot
Edit the top of the sketch. Every hexapod hosts its AP at 192.168.4.1 on port 1234, so usually only the SSID changes:
const char *ssid = "hexapod_nougat";
const char *password = "hexapod_1234";
const IPAddress udpAddress(192, 168, 4, 1);
const int udpPort = 1234;
Robots it drives
| Robot | ssid | Guide |
|---|---|---|
| Nougat | hexapod_nougat | Build |
| Mochi | hexapod | Build |
| Macaroon | hexapod_macaroon | Build |
Select ESP32C6 Dev Module as the board. If the port never shows up, hold BOOT, tap RESET, release BOOT, and upload again. The step-by-step version with photos is the Build the Arcade Remote guide.